marcelpetrick
Check all existing tags for a certain tumblr
Before you start any implementation: check your field of interest for existing solutions! This may sound awkward, but re-inventing the wheel is not what you should do with you spare time!
I was thinking about a simple and easy way to fetch all existing tags for a certain tumblr. Since they are not presented directly in an obvious way testing the commonly used things like “me”, “myself” or “own” helps, but takes time.
Looks like Benjamnin Horn did something like this. Together with some explanation.
The working example for doing your “researches” can be found here.
Good work!
CodeCombat: learning Python the cute way
I am currently trying to enhance my skills by learning Python. I made a choice between Ruby and Python after I was quite frustrated sometimes while writing the contactSheet-script. Bash is missing some general debug-abilities (or I don’t know them ;)) and the way to control the code-/data-flow was quite limited from my POV. I came from high level-strong typed-precomiled C++ and then hit bash ..
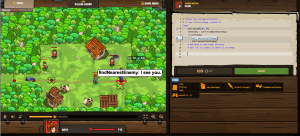
CodeCombat is a browser-only, completely OpenSource “game” where you lead your protagonist through its adventures by using code-snippets. One after another simple and more complicated statements are introduced, control structures like loops and alternatives follow. You can chose between different languages – besides Python also JavaScript is available.
It is quite amusing to guide the hero(ine). I finished already 22 levels.
For in detailed explainations I stick to: “Learn Python the hard way“
Create an usable linux-usb-drive with OSX
Based on this tutorial (for Linux itself, use Unetbootin).
Open a terminal and then run:
|
1 2 3 4 5 6 7 8 9 10 |
echo "convert the iso" hdiutil convert -format UDRW -o linuxmint-17.2-cinnamon-64bit-rc.iso.img linuxmint-17.2-cinnamon-64bit-rc.iso echo "show all drives" diskutil list echo "make sure the drive-to-use is not mounted" diskutil unmountDisk /dev/disk4 echo "copy image to drive" sudo dd if=linuxmint-17.2-cinnamon-64bit-rc.iso.img.dmg of=/dev/rdisk4 bs=1m echo "safely eject the drive" diskutil eject /dev/disk4 |
Used it twice to create first a Kubuntu-stick (did not like the desktop-enviroment) and then a newer for Linux Mint (latest version).
Pos, Neg or Koda? What SF8-HDR-type does the file have?
I needed a quick and dirty solution to automatically check for the type of the given HDR-scan. Since some custom makernotes are used, the question was how to get by using exiftool the necessary information. A quick comparison with hexdump and diff showed the difference in the binary output.
So this tiny script will return the type of the given input as exitcode (checkable in terminal via “echo $?”): 1 for positive, 2 for negative and 3 for kodachrome. 0 for errors … and yes, this negates the POSIX-semantic! I guess someone more capable could turn it into a one-liner. Nevermind: it works and this is sufficient for my usage.
OSX: How to get imageMagick (working with fonts)?
Hmm, OSX offers out of the box a lot of UI-programs, but is missing most of the *NIX-fun. So if you need imageMagick for your work, you are missing it. The prepared installers are missing the support for the font-manipulation.
Of course, you can download and build all packages by yourself from scratch … or you use one of the nice packet-managers like fink, macports or homebrew.
The fastest way to get a usable OSX (tried with 10.10 and 10.8) for the contactSheet-script is by executing those simple four commands in your terminal. Existing internet-connection assumed:
|
1 2 3 4 |
ruby -e "$(curl -fsSL https://raw.githubusercontent.com/Homebrew/install/master/install)" brew install fontconfig brew install imagemagick brew install ghostscript |
(Linux: use your favorite package-manager.
Windows: :DDDDD I guess it won’t work until you also get some bash-replacement.)
Check afterwards the current configuration. The list of delegates should show “freetype” or “fontconfig”. If both are missing, then rendering the filename onto the thumbnails won’t work!
|
1 2 |
$ convert -list configure | grep DELEGATES DELEGATES bzlib mpeg freetype jng jpeg lzma png tiff xml zlib |
createContactSheet 0.4
Okee, sorry for the continued spam about this small bash-project, but I am a little bit excited. It turned out much more powerful than expected. I learned a lot new and really useful stuff. I am also really confident now about the future of “bash & me” 😉
I improved the latest state with an idea a good friend pointed out: why don’t you add the original file name to each thumbnail? For a better overview? This is done also by imageMagick (convert); also append now the base-directory as footer-note. Because for my workflow the dir-name is the scan-date and the emulsion-type.
Some other improvements are: changed workflow (negative-conversion on each picture instead of the whole combined one; therefore no “filling of the last row” needed); script-parameters for help and version and for suppressing the negfix8-conversion; cleaner code.
I have also some more ideas in mind, but I think for now it is enough. It was fun, but I also want to discover some other areas of IT!
Download this: createContactSheet_0.4
createContactSheet 0.3
I fixed a small glitch, which was included in the first releases: input-filenames with spaces were not treated correctly therefore no result was created. Fixed by some string-replacement and setting the IFS-variable which dictates that bash should treat spaces not as separators.
For the next release some filename-embedding into the thumbnail is planned. But this has to happen after the negfix8-conversion else it would alter the conversion itself ..
Download this: version_0.3
Small hint: git offers a really nice exporting-function which will just include the current state of the given branch:
|
1 |
git archive master --output="version_0.3.zip" |
You want a contact sheet with that?
Slogan is like always: “If you are not ashamed of the first release of XYZ, then you waited too long or have no self-reflection.”
It would be nice to have a preview shaped like the original contact sheets of a HDR-film scan. So you could screenshot the thumbnails and print this.
Or you try the following script:
- it takes all TIF from one directory (assuming they are HDR-scans from SilverFast)
- creates thumbnails with a longer side of 400px into a separate directory
- appends six thumbnails for each row and the combines all rows to a single picture. If the number of pictures does not fit, the last picture is repeatedly appended (this is necessary due to the negative conversion)
- ‘negfixes’ them (negative conversion done by the great original script of negfix8 from JaZ99!)
- spreads the contrast in two diffent approaches (check yourself which is your most liked version)
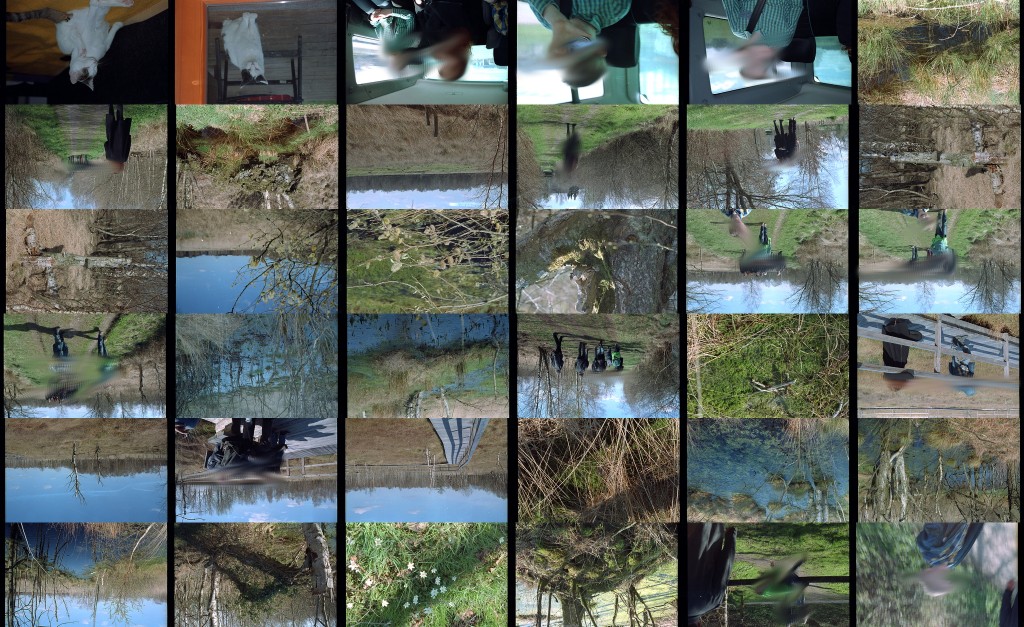
As a result you get something like this:
As you can see: the black strips at the left and right side of the pictures still exist. But since I scan always the HDR-files with top and bottom cropped, the black borders don’t show up there. Time to change my workflow?
Download:
- newest version: contactSheet_0.2
- contactSheet_0.1
HowTo:
- download & extract the two scripts
- open a bash-terminal an navigate INTO the directory with the HDR-scans
- run “/PATHTOSCRIPT/createContactSheet.sh” and wait for 2 to 3 minutes
Future plans:
- improve the structure of the code and add some more comments and make it less error-prone
- full clean-up after the creation (by default; suppresable by param)
- suppress the negfixing by param so also E6 (slide)-scans can be ‘contact sheeted’
- make the script use the general temp-folder and put just the final two contact sheets into the target folder (so the data stays clean)
- add the filename in the bottom-right as transparent overlay so you know which thumbnail belongs to which picture
edit 20150603: Just uploaded version 0.2 which improves performance a lot and cleans everything up and has a nicer structure!
What was your favourite command?
It’s been a while since the last post, but I was not lazy. As you may have noticed the “nanalogue photo development-page” grew with more examples.
Here is another short classic for your shell-history*: what are your most used terminal-commands?
* If not bash, then adapt your history-path. If you did not activate the history … then it would not work 😉
|
1 2 3 4 5 6 7 8 9 10 11 12 13 14 15 16 17 18 19 20 21 |
$ cat ~/.bash_history | cut -d " " -f1 | sort -nr | uniq -c | sort -nr 1615 git 1338 cd 1029 tail 922 rm 729 ls 672 history 588 pwd 300 ./lupdate_all.command 172 cat 155 make 153 g++ 148 man 145 luupdate 132 exiftool 111 107 sudo 105 ./configure 104 grep 93 lsof .. |
part II: Remove multiple whitespace-lines from a file
I was so annoyed that the simple idea with sed did not worked like I wanted, that I wrote a short full-fledged Qt-appp for it. Code follows. Just compile the main.cpp. Usage is also explained in the header of the file.
I know it’s like to break a butterfly on a wheel, but I need this functionality since I don’t want to do such a boring task like code-styling by myself ..
Update: first version had a small glitch! Found after applying it to some bigger files.
|
1 2 3 4 5 6 7 8 9 10 11 12 13 14 15 16 17 18 19 20 21 22 23 24 25 26 27 28 29 30 31 32 33 34 35 36 37 38 39 40 41 42 43 44 45 46 47 48 49 50 51 52 53 54 55 56 57 58 |
//! @brief lessWhite should remove all multiple empty lines (newline, whitespace, tabs, spaces, ...) from the given input. //! Based on the standard POSIX channels stdin, stdout, stderr. //! usage like: $ ./lessWhite < input.txt > output.txt //! terminal output will look like: "removed 67 lines!" //! @author mail@marcelpetrick.it //! @version 0.02 (bugfix for "output had one additional newline at the end") //! //! history: 0.01: initial state #include <QTextStream> #include <QString> int main(int argc, char *argv[]) { Q_UNUSED(argc); Q_UNUSED(argv); QTextStream stream(stdin); QString output; //the combined stuff: no checks for overflow QString line; bool lastWasEmpty(false); int removedLines(0); bool isVeryFirstLine(true); do { line = stream.readLine(); bool const currentIsEmpty(line.trimmed().isEmpty()); if(currentIsEmpty && lastWasEmpty) { removedLines++; //do nothing } else { if(!isVeryFirstLine) //prevent the bug with the last line == double newline { output.append("\n"); } else { isVeryFirstLine = false; //reset now } output.append(line); } lastWasEmpty = currentIsEmpty; } while(!line.isNull()); //output QTextStream cout(stdout); cout << output; //print to stdout QTextStream cerr(stderr); cerr << "removed " << removedLines << " lines!\n"; //print to stderr } |

