raspberry pi
Fresh Raspberry Pi 400, but package-manager ‘dead’
It’s never early enough to inspire, so my firstborn got two days ago her first own computer. I don’t want that she grows comfortable with touching a smartphone, but not knowing what happens in the “back”, so she got a Raspberry Pi 400.
I did not expect that the red-white color-combination of the keyboard-like module with it’s raspberry-button will spark so much joy!
The first evening we unwrapped everything and she put all cables in and we booted it right from the preconfigured sd-card. Nice, very comfortable.
Problem:
Then I wanted to run ‘apt-get’ to fix the updates and maybe install a paint-like program ..
Error

Repository ‘http://deb.debian.org/debian buster-updates InRelease’ changed its ‘Suite’ value from ‘stable-updates’ to ‘oldstable-updates’
So neither apt-get update or any of the first tips I checked, worked. Until I found this:
sudo apt-get update --allow-releaseinfo-change
Problem solved, but – would a newcomer or young person be able to fix this?
I doubt it. This isn’t really user-friendly ..
edit:
Anyway: Since update of the distribution from ‘buster’ to ‘bullseye’ by editing two package lists did not really go well, I’ve deployed a ‘real’ bullseye-image onto the sd-card and we fixed the rest of the configuration in minutes 🙂
external backups pt. II
The worst archivist?
Of course, I know him.
It’s me.
So, some month ago I was writing about how to create and maintain some external backup [link] from data stored on the NAS.
I’ve also put some fancy commands, but when I wanted to do the scheduled refresh of the backup, I noticed, that my ‘documentation’ is without any value.
And this is due to continued iterations of the setup and the used commands, but not updating the documentation.
- Setup
* activate the rsync-access on the DS213 via UI (else ‘permission denied’ is reported even when you can SSH in and check the rsync-version and then wonder what fails ..)
* plug the external HDD to the Raspberry Pi 3B

* run via VNC-remote-login in a bash on the RPi
rsync -avrh admin@ds213:/volume1/Photoshare_privat/ /media/pi/1.42.6-25556/Photoshare_privat/ && rsync -avrh admin@ds213:/volume1/homes/Marcel/ /media/pi/1.42.6-25556/homes/Marcel/ && rsync -avrh admin@ds213:/volume1/homes/ruzica/ /media/pi/1.42.6-25556/homes/ruzica/ && rsync -avrh admin@ds213:/volume1/homes/admin/ /media/pi/1.42.6-25556/homes/admin/ && rsync -avrh admin@ds213:/volume1/Camera/ /media/pi/1.42.6-25556/Camera/ && rsync -avrh admin@ds213:/volume1/photo/ /media/pi/1.42.6-25556/photo/ && rsync -avrh admin@ds213:/volume1/Musik/ /media/pi/1.42.6-25556/Musik/
to copy all relevant partitions
keep the catcam up to date
Logging in to the raspberry(ies) to update them on a regular basis takes time and effort. Both are currently dear.
Also: while the catcam is taking pictures, you can’t update the rpi-binaries.
So I made this nice script, which first suspends the catcam-operation while renaming the script from the cronjob, then does all updates, reverts the renaming and then reboots the MCU.
|
1 2 3 4 5 6 7 8 9 10 11 |
#!/usr/bin/env bash # author: Marcel Petrick (mail@marcelpetrick.it) mv /home/pi/Desktop/webcam/regulargif.sh /home/pi/Desktop/webcam/regulargif.sh1 sudo rpi-update sudo apt-fast update && sudo apt-fast dist-upgrade -y sudo apt-get autoclean sudo apt-get autoremove mv /home/pi/Desktop/webcam/regulargif.sh1 /home/pi/Desktop/webcam/regulargif.sh sudo reboot |
Make it executeable via ‘sudo chmod +X updateCatcam.sh’ and also add it as cronjob (once a day).
netdata for monitoring several (headless) Raspberries
I had netdata already recommended once two years ago, but .. it was quite helpful to track down the issue with the camera on the catcam-raspberry. Yes, of course I could login via SSH or VNC and then manually check if it is still running, or just call “catcam:19999” in the browser.
Install on Raspbian Jessy via:
|
1 |
bash <(curl -Ss https://my-netdata.io/kickstart.sh) |
Catcam upgraded!
Finally! The old catcam-setup of a RPi 3 with a NoIR v2.1-camera was working for almost one and ahalf years without any issues. I’ve had improved the PiCamGifForTumblr-script several times, also changed location – never any issues. More than 40.000 GIF were uploaded.
But then I decided to buy a new, fancy case in black (of course) which should add some camera-support. And then two weeks afterwards it stopped working. Sporadically frozen. Sometimes 10 min after start, sometimes during the night. I checked the casing, if all power connectors were tightly fit, I installed netdata on it, I did longterm temperature-measurements (never over 54 °C even with closed case), I ran with minimal setup or with cam attached.
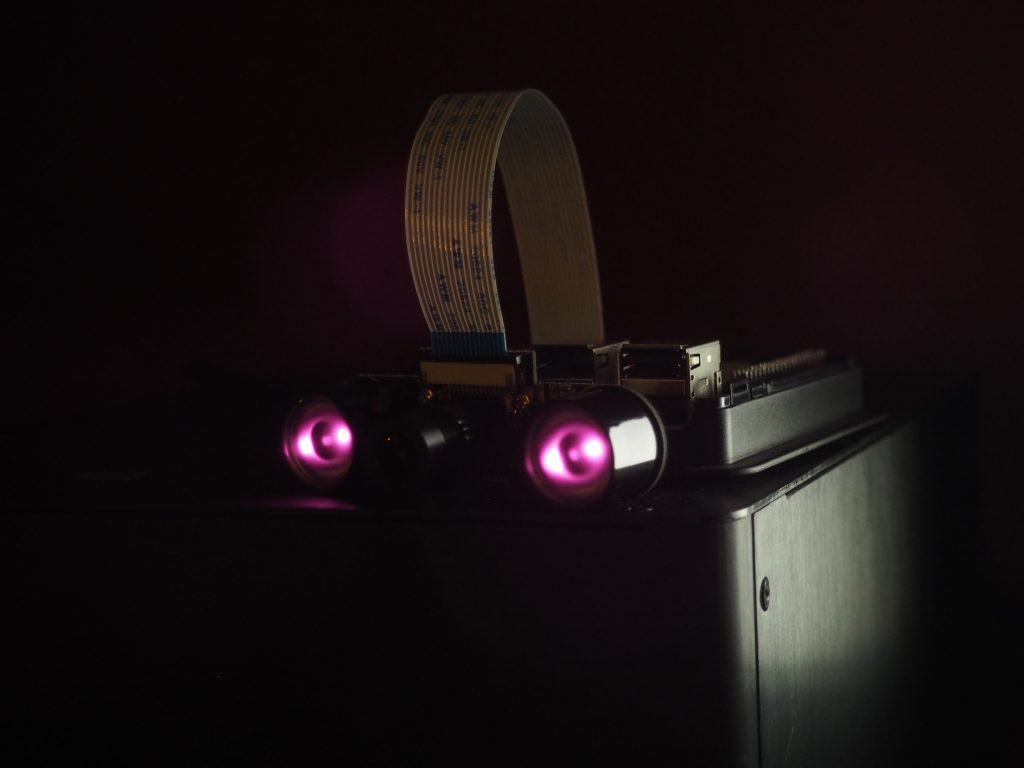
Then it became clearer: the camera was working for singleshot-mode, but for the 30 pictures every ten minutes, it broke. So, it was time to order a new camera, 1080p (5 MPixel) were enough, but for four more Euro I could get two IR-illuminators … so, why not? The focal distance of the objective is adjustable, it looks like it works (long time-test needed). But I am happy. And we can watch cats (and family) in darkness :3
tracking bugs in complex systems ..
Some weeks ago I’ve replaced the case of the ‘catcam’. A Raspberry Pi 3 which was running for 1.5 years without interruption with the nice script & python-upload triggered by a cronjob. And now the device freezes. Still running, but neither accessible via SSH nor VNC (of course, if SSH is not working ..).
I left the case open; removed the camera; upgraded kernel and Raspbian: nothing helped.
My last guess is that the camera stopped working. But to be sure I want to let the RPi3 long-time with temperature-logging. So … we need a simple program:
|
1 2 3 4 5 6 7 8 9 10 |
import os import time def measure_temp(): temp = os.popen("vcgencmd measure_temp").readline() return (temp.replace("temp=","")) while True: print(time.ctime() + " ## " + measure_temp()) time.sleep(1) |
executed like this, because else the output is buffered up to 4 or 8 kByte:
|
1 |
$ stdbuf -oL python temperature.py > worstLoggingEver.txt |
and the content of the textfile is something like:
|
1 2 |
Tue Mar 6 22:52:59 2018 ## 51.5'C Tue Mar 6 22:53:00 2018 ## 52.1'C |
backup your Raspberry Pi-sd card
|
1 2 3 4 5 6 7 8 9 10 11 12 13 14 15 16 17 18 19 20 |
tanteedith@miniPC ~/ $ lsblk NAME MAJ:MIN RM SIZE RO TYPE MOUNTPOINT sdb 8:16 1 29G 0 disk ├─sdb2 8:18 1 1K 0 part ├─sdb7 8:23 1 27,3G 0 part /media/tanteedith/root ├─sdb5 8:21 1 32M 0 part /media/tanteedith/SETTINGS ├─sdb1 8:17 1 1,1G 0 part ├─sdb8 8:24 1 512M 0 part /media/tanteedith/data └─sdb6 8:22 1 66M 0 part /media/tanteedith/boot sda 8:0 0 119,2G 0 disk ├─sda2 8:2 0 7,7G 0 part [SWAP] ├─sda3 8:3 0 81,1G 0 part /home └─sda1 8:1 0 30,5G 0 part / tanteedith@miniPC ~/ $ sudo dd bs=4M if=/dev/sdb of=catcam.img 7416+0 records in 7416+0 records out 31104958464 bytes (31 GB) copied, 2794,33 s, 11,1 MB/s tanteedith@miniPC ~/ $ |
Newer versions (8.24+) of coreutils dd have also a progress-option, but not the one bundled with the current distribution ..
add param: “status=progress”
The moment you login the first time remotely via app to your Redmine <3
aka: Accessing Redmine outside your local network via Android-app.
I set up port-forwarding via the router. Dynamic name is set via the Synology NAS.
So the url to use is: http://metrik.myds.me:5002/redmine
And after testing 5 (in words: FIVE!) apps with really mixed results, I choose:
Redmine Mobile app made Easy
Redmine on Raspberry Pi 3
There was the need to write down in a structured way all the ongoing (private) projects. Keeping track, assign them to the members of my family, etc ..
From former working experience I knew OTRS, Redmine and JIRA. All with their respective benefits and drawbacks. (tl;dr .. I prefer Redmine.)
Hardware: RPi3; 32 GByte SD-card; keyboard; mouse, 1920×1080-monitor; power-cable
Software: running Raspbian; then follow this tutorial
Since this does NOT yield success, add those steps:
|
1 2 3 4 5 6 7 8 9 10 11 12 13 14 |
1. Contents of /etc/apache2/sites-available/redmine.conf DocumentRoot /var/www/ PassengerDefaultUser www-data <Location /redmine> RailsEnv production RackBaseURI /redmine Options -MultiViews </Location> 2. Disable the apache2 default site: $ sudo a2dissite 000-default |
Et voila: working version. Go on, create accounts, roles, projects and tickets 🙂
Enforce HDMI with 1920×1080 on Raspberry Pi 3 and Raspbian
Ok, we have a brand new RPi, an SD-card with the latest Raspbian, some brand new monitor with HDMI-input only.
Everything is set up, the power plugged in, one LED shines, another one, then “no signal” on the monitor.
0. SSH-access not possible due to the fact that because of those botnet-takeovers of RPi in the past the default access was disabled for fresh images.
1. Wifi with VNC also impossible, because how to set the Wifi-credentials if you can’t see something?
2. VGA not possible due to hardware-limitations.
Great 🙂 I love when soft-/hardware does not work out of the box :’)
After a while of tinkering I remembered that I had to enforce the HDMI-ouput on the first RPi (the one for the catcam).
Can be set inside /boot/config.txt (leafpad is the current default editor on Raspbian).
|
1 2 3 4 5 6 7 8 9 10 11 12 13 14 15 16 17 18 19 20 21 22 23 24 25 26 27 28 29 30 31 32 33 34 35 36 37 38 39 40 41 42 43 44 45 46 47 48 49 50 51 52 53 54 55 56 57 58 59 60 61 62 |
# For more options and information see # http://rpf.io/configtxt # Some settings may impact device functionality. See link above for details # uncomment if you get no picture on HDMI for a default "safe" mode #hdmi_safe=1 # uncomment this if your display has a black border of unused pixels visible # and your display can output without overscan disable_overscan=1 # uncomment the following to adjust overscan. Use positive numbers if console # goes off screen, and negative if there is too much border #overscan_left=16 #overscan_right=16 #overscan_top=16 #overscan_bottom=16 # uncomment to force a console size. By default it will be display's size minus # overscan. #framebuffer_width=1280 #framebuffer_height=720 framebuffer_width=1920 framebuffer_height=1080 # uncomment if hdmi display is not detected and composite is being output hdmi_force_hotplug=1 # uncomment to force a specific HDMI mode (this will force VGA) hdmi_group=2 hdmi_mode=82 # uncomment to force a HDMI mode rather than DVI. This can make audio work in # DMT (computer monitor) modes #hdmi_drive=2 # uncomment to increase signal to HDMI, if you have interference, blanking, or # no display #config_hdmi_boost=4 # uncomment for composite PAL #sdtv_mode=2 #uncomment to overclock the arm. 700 MHz is the default. #arm_freq=800 # Uncomment some or all of these to enable the optional hardware interfaces #dtparam=i2c_arm=on #dtparam=i2s=on #dtparam=spi=on # Uncomment this to enable the lirc-rpi module #dtoverlay=lirc-rpi # Additional overlays and parameters are documented /boot/overlays/README # Enable audio (loads snd_bcm2835) dtparam=audio=on # additional shit by me start_x=0 gpu_mem=128 |


