SilverFast8
Well-equipped and already upgraded.
Due to the fact that I shoot a lot of expired 135 film, developd and digitalize it, I decided it’s time to acquire my own film scanner.
After some brief thinking I aimed for a Nikon LS 4000 or 5000. Facts which mattered were the unreached resolution of 4.000 dpi (for real – not some marketing speech), high dynamic range and the automatic transport of filmstrips (pure convenience).
With some luck I grabbed a fairly cheap LS 4000 in nearly mint condition with MA21- and SA21-holders. Needless to say I spent some more money on new firewire-cables, a pc-express-card and other crap. After upgrading the firmware from 1.05 to 1.10 SilverFast 8 also recognized the holder correctly. Nikon Scan and vueScan did right out of the box.
But at least the best improvement was quite cheap: why stay with a “just 6 frames per filmstrip allowed”-holder if you can have a SA30?
I bought the combination with the following upgrade in mind. For now the revertable version is applied and working 🙂
Step 0: connect pin 4 and 5 with a thin wire; Step 1: put cover it with some tape and poke holes inside for the male connectors; Step 2: gently push it inside
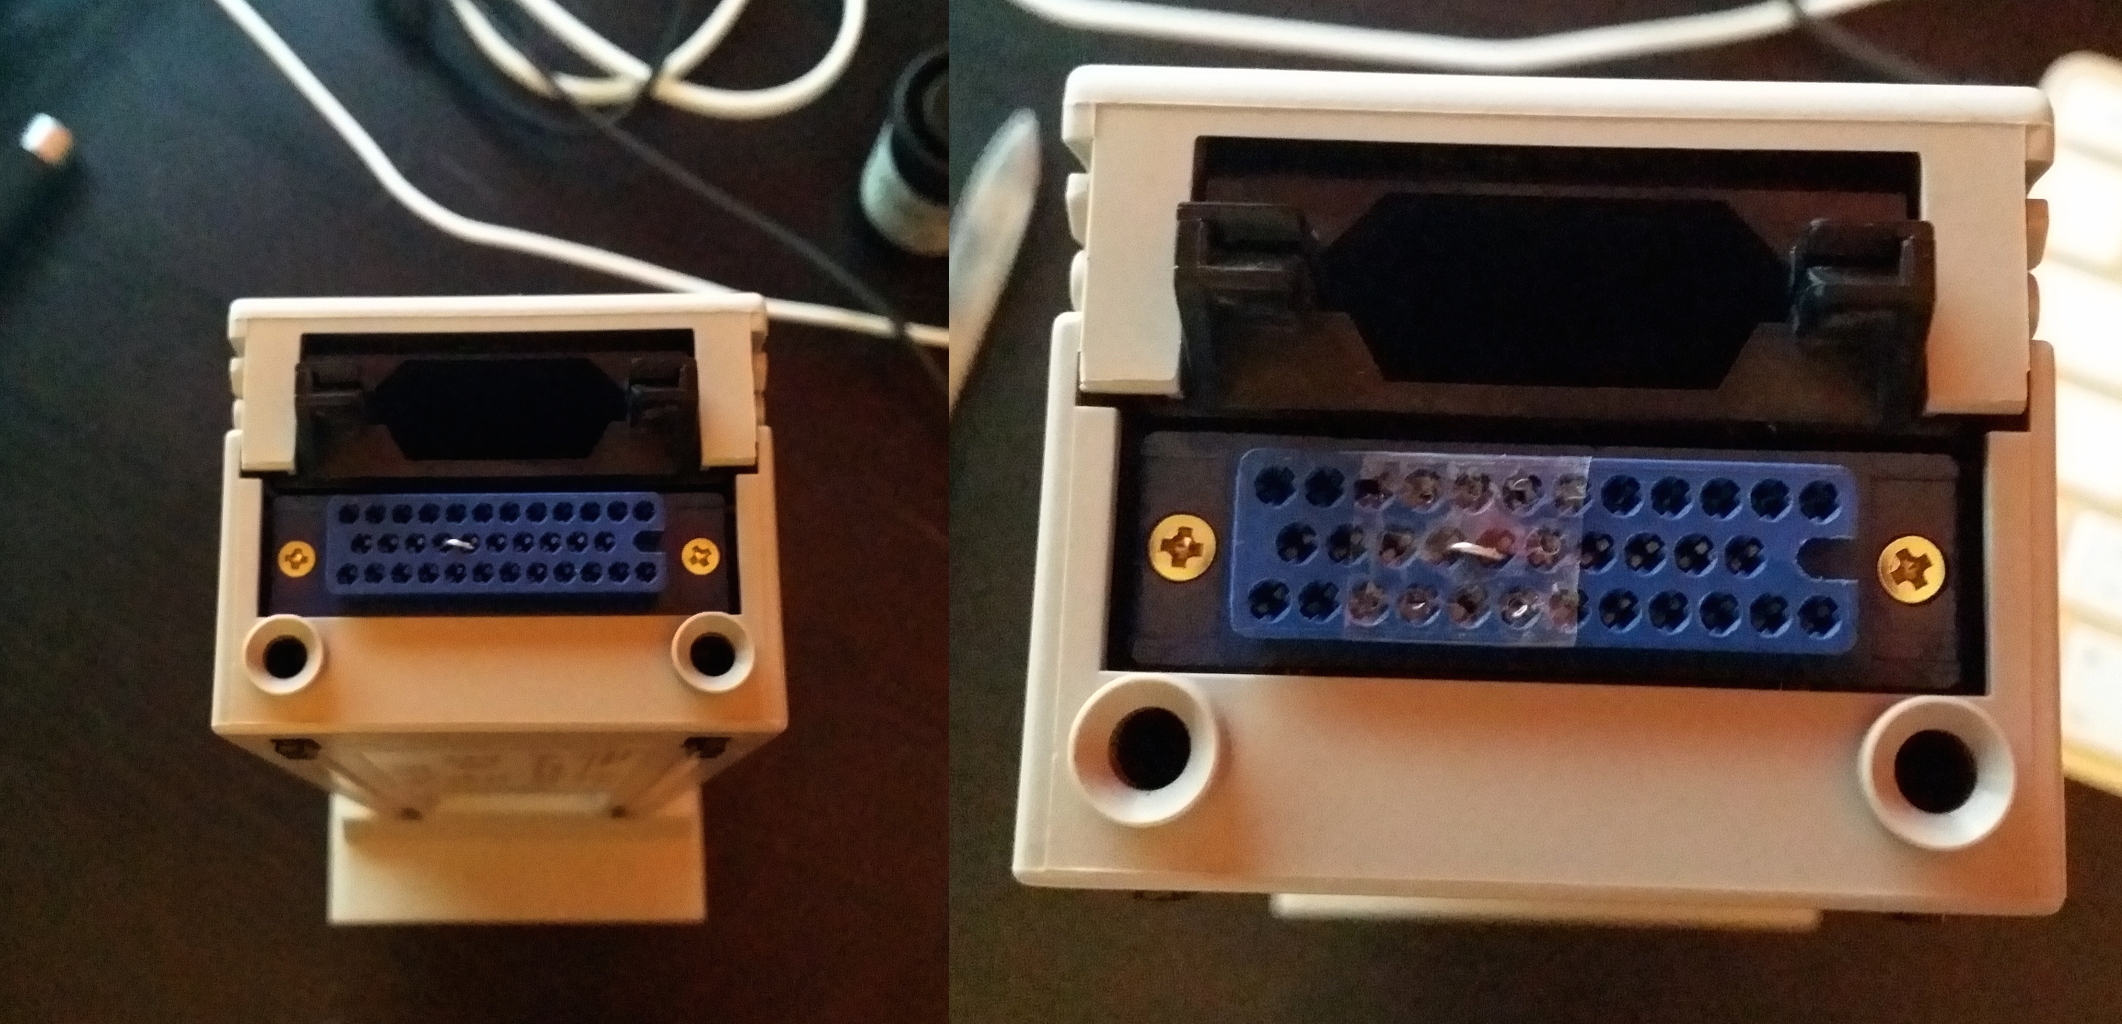
Upgrade complete!
Pos, Neg or Koda? What SF8-HDR-type does the file have?
I needed a quick and dirty solution to automatically check for the type of the given HDR-scan. Since some custom makernotes are used, the question was how to get by using exiftool the necessary information. A quick comparison with hexdump and diff showed the difference in the binary output.
So this tiny script will return the type of the given input as exitcode (checkable in terminal via “echo $?”): 1 for positive, 2 for negative and 3 for kodachrome. 0 for errors … and yes, this negates the POSIX-semantic! I guess someone more capable could turn it into a one-liner. Nevermind: it works and this is sufficient for my usage.
You want a contact sheet with that?
Slogan is like always: “If you are not ashamed of the first release of XYZ, then you waited too long or have no self-reflection.”
It would be nice to have a preview shaped like the original contact sheets of a HDR-film scan. So you could screenshot the thumbnails and print this.
Or you try the following script:
- it takes all TIF from one directory (assuming they are HDR-scans from SilverFast)
- creates thumbnails with a longer side of 400px into a separate directory
- appends six thumbnails for each row and the combines all rows to a single picture. If the number of pictures does not fit, the last picture is repeatedly appended (this is necessary due to the negative conversion)
- ‘negfixes’ them (negative conversion done by the great original script of negfix8 from JaZ99!)
- spreads the contrast in two diffent approaches (check yourself which is your most liked version)
As a result you get something like this:
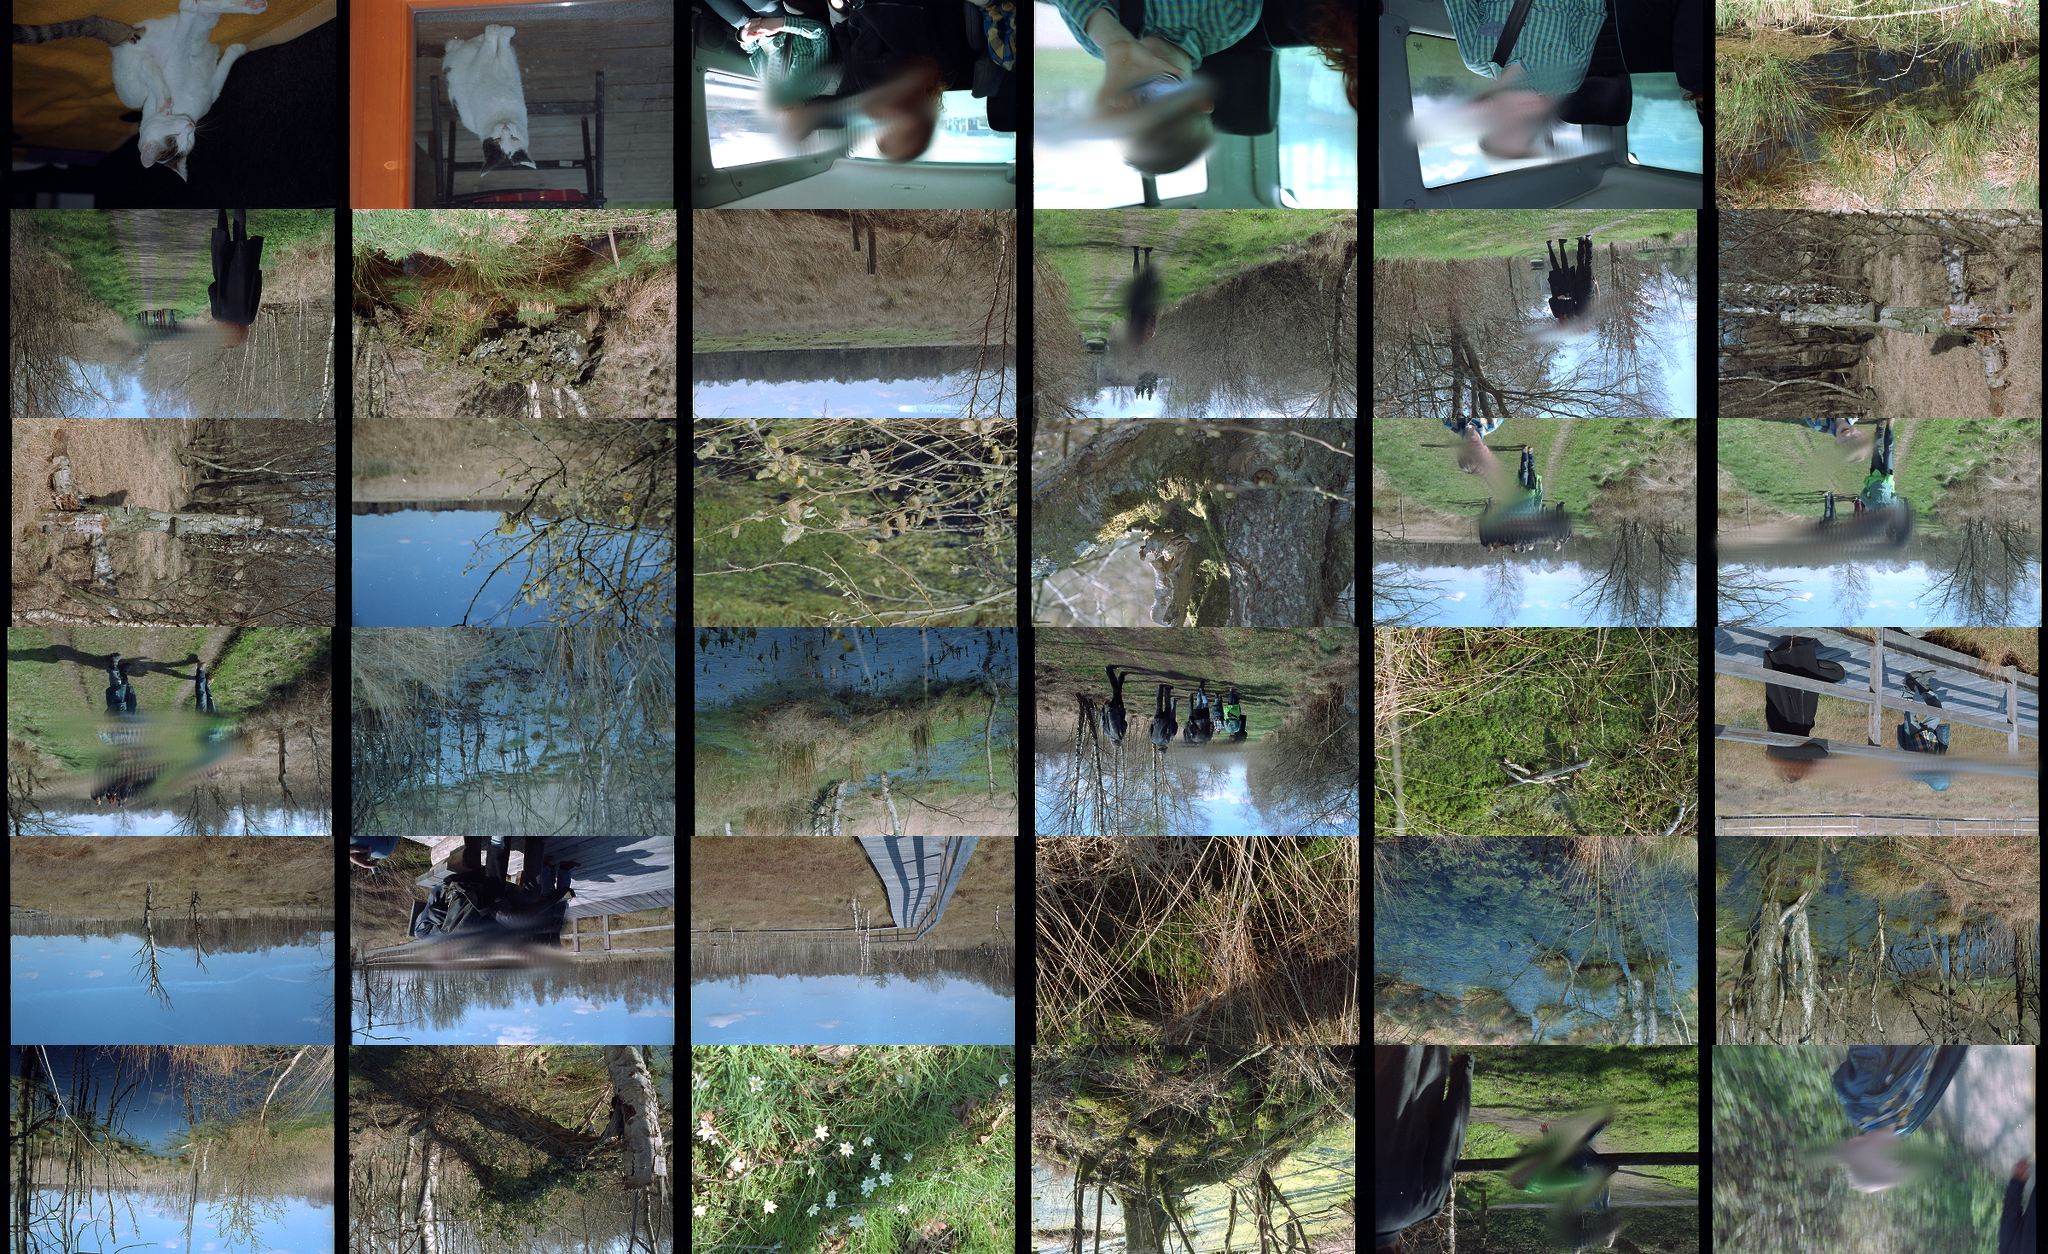
As you can see: the black strips at the left and right side of the pictures still exist. But since I scan always the HDR-files with top and bottom cropped, the black borders don’t show up there. Time to change my workflow?
Download:
- newest version: contactSheet_0.2
- contactSheet_0.1
HowTo:
- download & extract the two scripts
- open a bash-terminal an navigate INTO the directory with the HDR-scans
- run “/PATHTOSCRIPT/createContactSheet.sh” and wait for 2 to 3 minutes
Future plans:
- improve the structure of the code and add some more comments and make it less error-prone
- full clean-up after the creation (by default; suppresable by param)
- suppress the negfixing by param so also E6 (slide)-scans can be ‘contact sheeted’
- make the script use the general temp-folder and put just the final two contact sheets into the target folder (so the data stays clean)
- add the filename in the bottom-right as transparent overlay so you know which thumbnail belongs to which picture
edit 20150603: Just uploaded version 0.2 which improves performance a lot and cleans everything up and has a nicer structure!
Get an overview which SilverFast8-version was used to process your photos
It is very interesting to see which SilverFast8-version was used for scanning and processing the photos you have digitalized.
The following crude bash-chain-command relies on the GNU-tools, exiftool and some intermedite files. It is not sophisticated or using any syntactic sugar: it just works*.
(* means: has a lot of improvement-potential)
abilities:
- checks for exiftool first: if not available (missed the installation?), then abort
- checks all original SF8-output-types: tif, jpg, jp2 and dng
- searchs stupidly for the “Software”-tag; if other software touched the files that can be missing
- collects the data into files “versions.txt” and “uniqed.txt” which are not deleted after the run!
|
1 2 3 4 |
type exiftool >/dev/null 2>&1 || { echo >&2 "required exiftool is not installed. Aborting"; exit 1; } && find . -type f \( -name "*.tif" -o -name "*.jpg" -o -name "*.jp2" -o -name "*.dng" \) -exec exiftool "{}" \; | grep "Software : SilverFast" > versions.txt && sort versions.txt | uniq -c | sort -nr > uniqed.txt && cat uniqed.txt |
example output:
|
1 2 3 4 5 6 7 8 9 10 11 12 |
234 Software : SilverFast 8.0.1 r20 (Feb 6 2013) 92 Software : SilverFast 8.0.1 r30 (Sep 11 2013) 69 Software : SilverFast 8.0.1 r20 (Feb 8 2013) 58 Software : SilverFast 8.0.1 r24 (Apr 23 2013) 24 Software : SilverFast 8.0.1 r19 (Jan 15 2013) 23 Software : SilverFast 8.0.1 r35 (Nov 25 2013) 23 Software : SilverFast 8.0.1 r21 (Feb 13 2013) 20 Software : SilverFast 8.0.1 r42 (Mar 6 2014) 19 Software : SilverFast 8.0.1 r50 (Jul 15 2014) 18 Software : SilverFast 8.2.0 r1 (Oct 9 2014) 17 Software : SilverFast 8.0.1 r54 (Sep 12 2014) 14 Software : SilverFast 8.0.1 r51 (Aug 4 2014) |
ps. Just noticed that SF6-files are also checked correctly.