Arduino
MicroPython (uPython) – the future is here
My activity with the ESP8266/ESP32 boards had somehow fallen asleep after I set up one of the ESP8266 as Wifi-repeater. It worked, but creating own devices was too cumbersome. Firing up the ArduinoStudio took ages, building and downloading the firmware in C++ was error-prone, took ages (seriously, this is a tiny program, what the hell happens in the background?).
But I knew there exists a path, which could save some time: µPython (micropython). It runs a firmware, you just deploy your “code”. In my case now a tiny hello-world-like program.
I used this and that tutorial and the uPyCraft-IDE. Got it working with an ESP8266 in minutes.
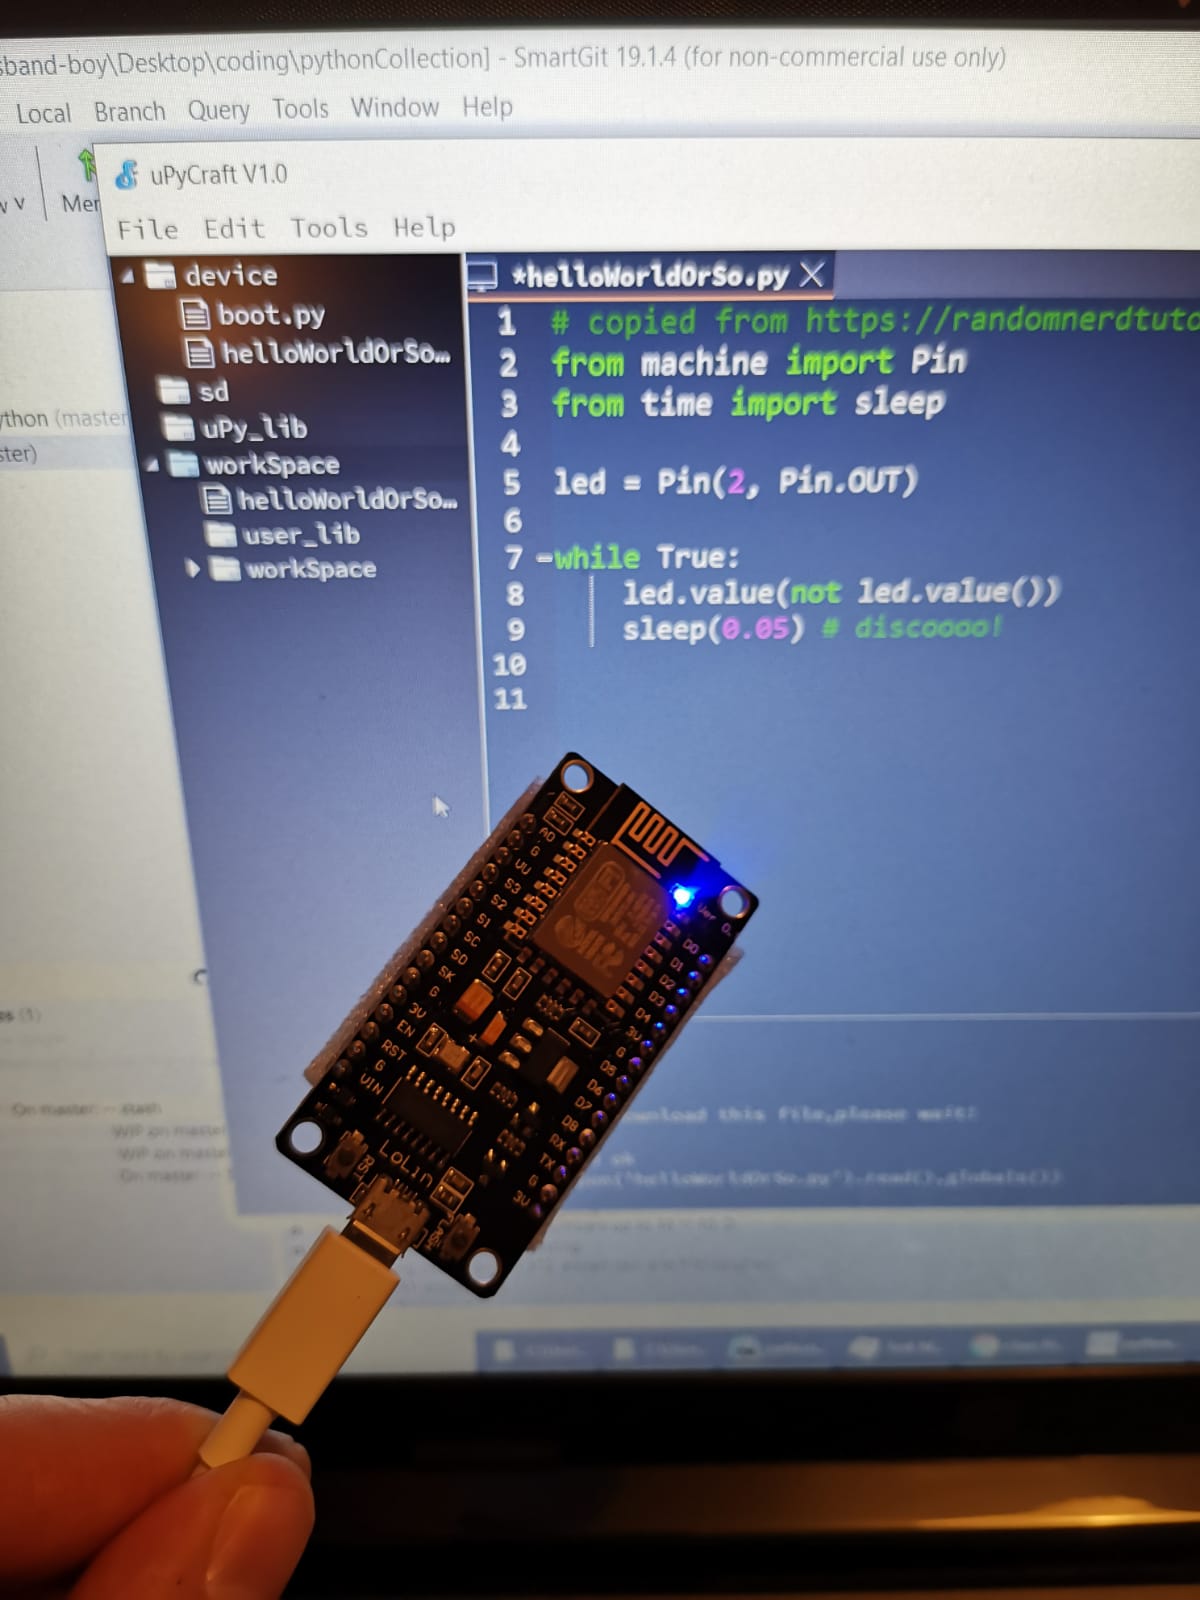
Seriously: goodbye crappy, non-structured and slow-to-build C/C++ for my microcontrollers. The future is here o/
By the way: the motivation also comes from my current daily practice of Python (of course, I still contribute to C++/Qt-based projects), but my current flame is Python (for Project Euler and daily coding challenges).

Heltec WifiKit 8
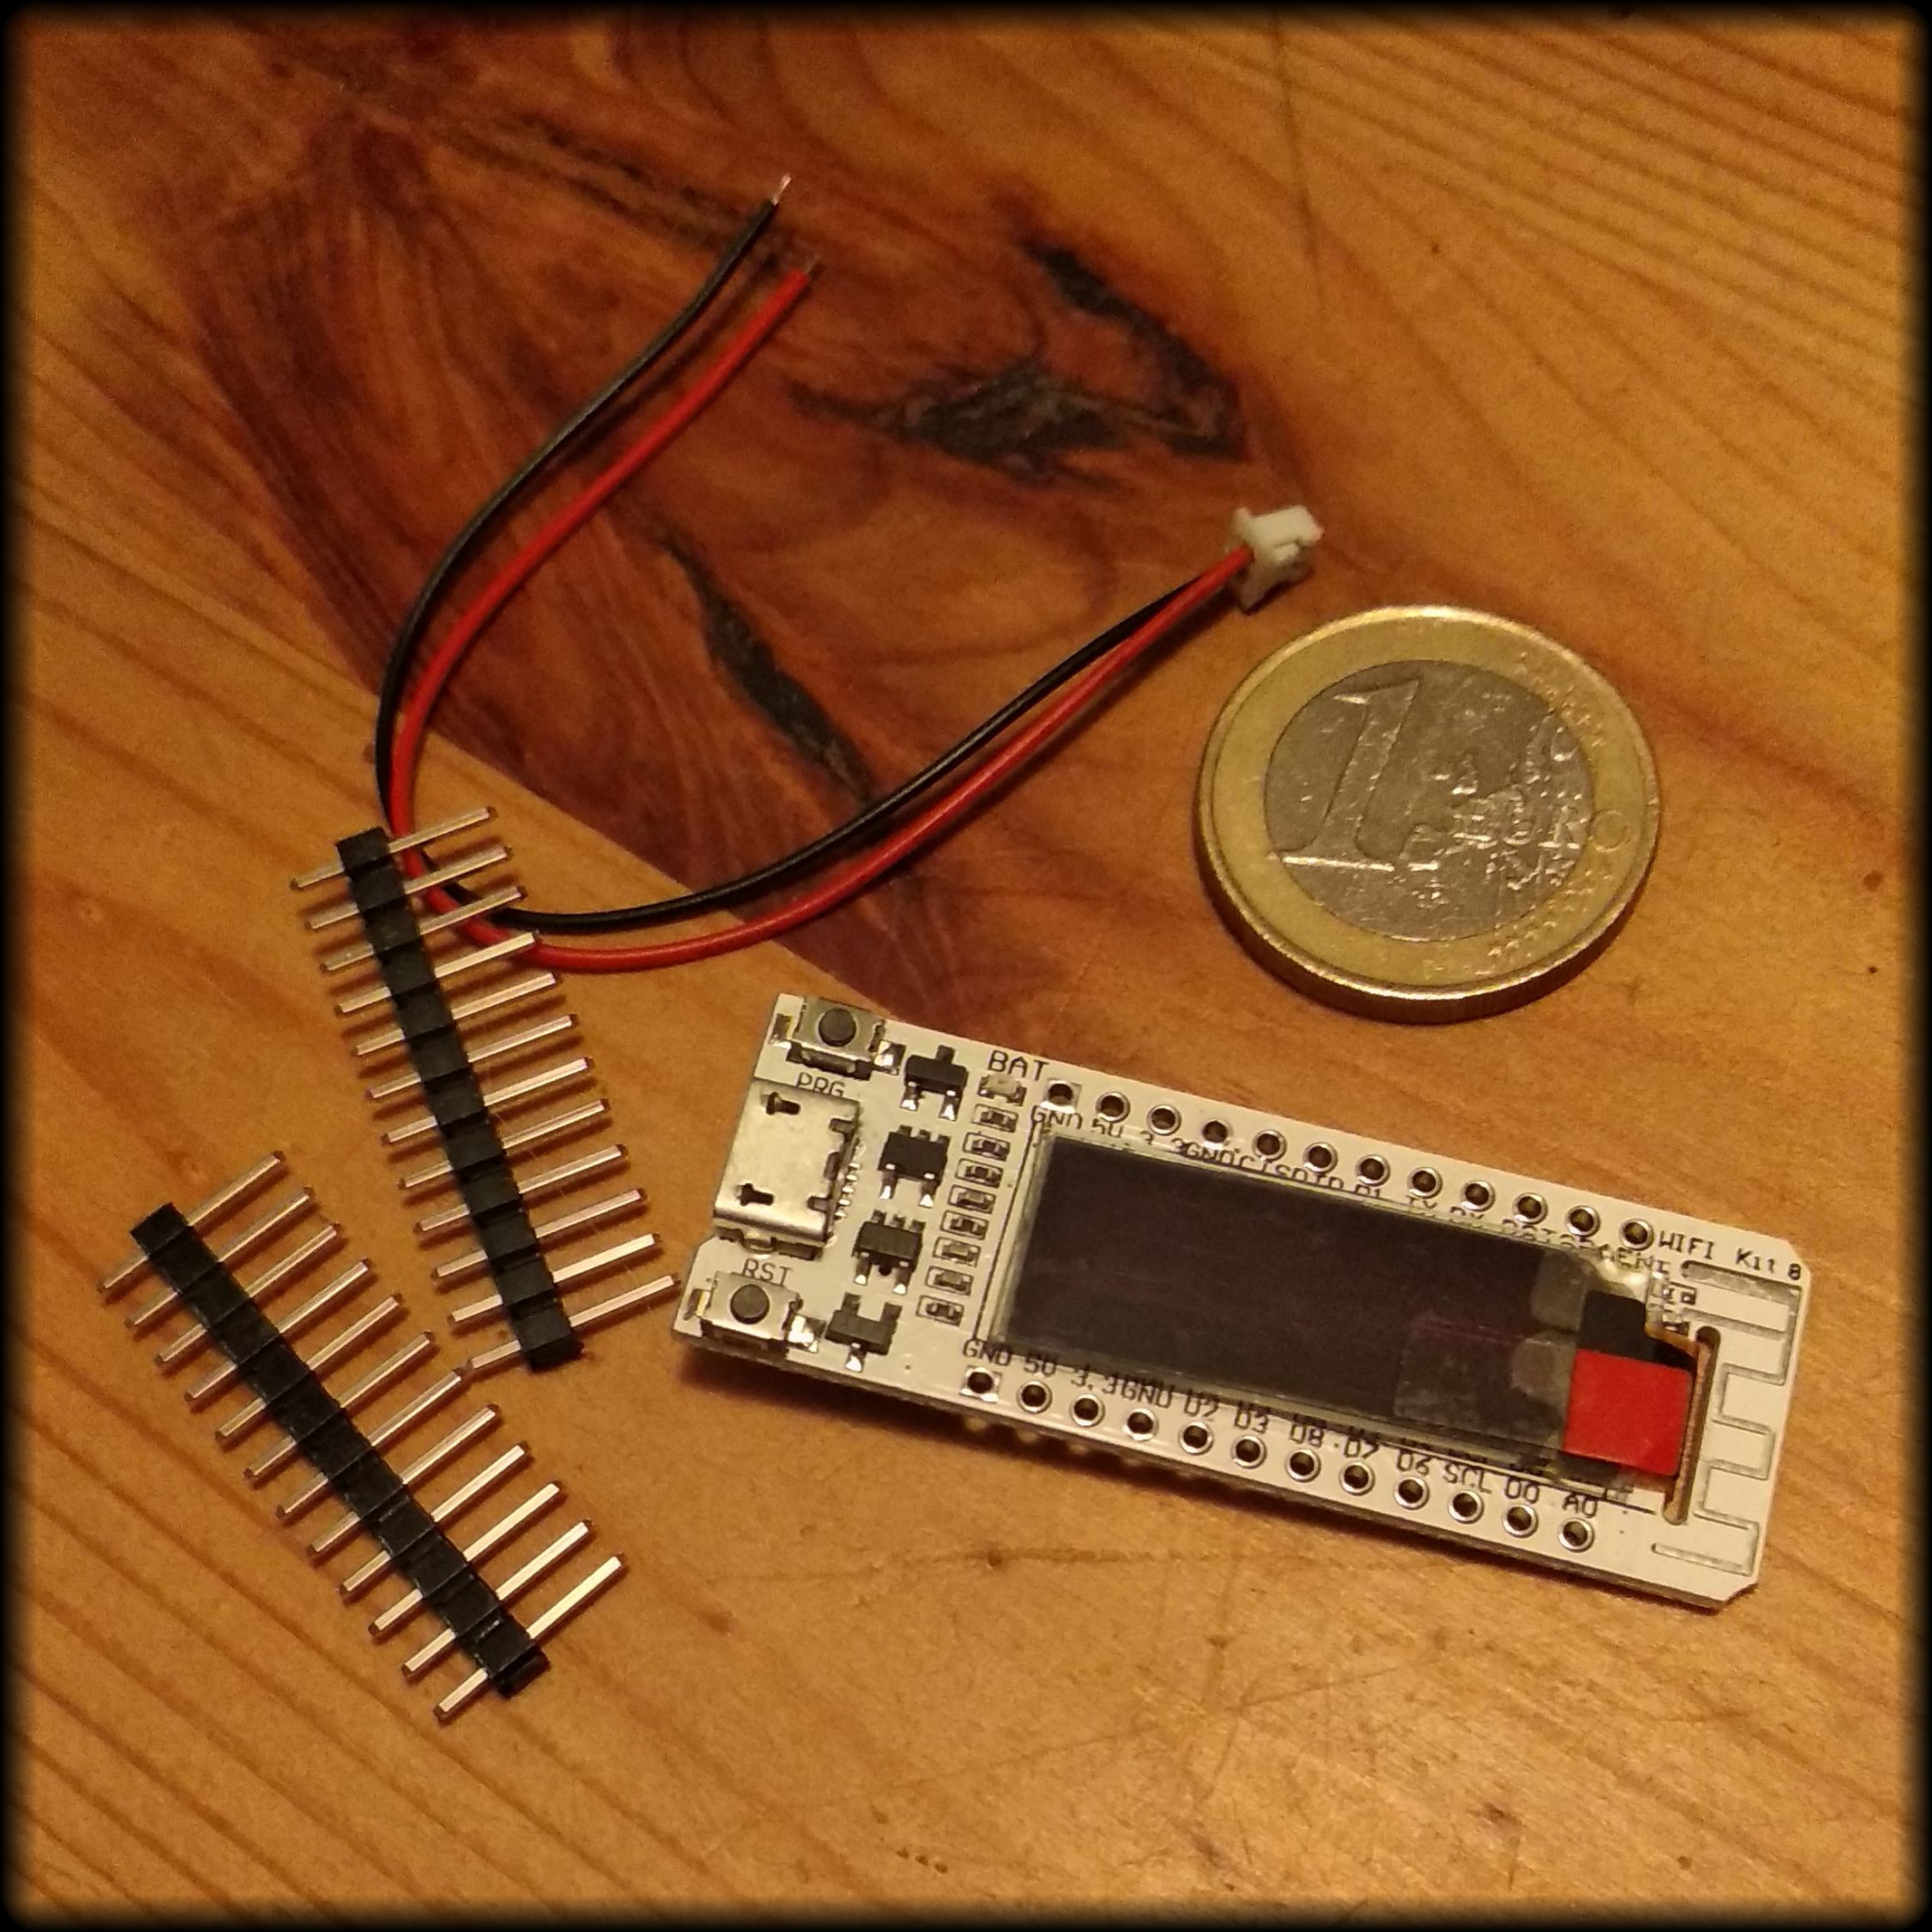
Ordered myself two Wifikit8 Esp8266-based boards from Aliexpress.
Received them after roundabout two weeks and now the fun can start.
With the integrated 0.91″ display (128×32 Pixel) a lot of effort for integrating some display or LEDs can be saved. Just noticed that a LiPo-charger is built-in as well, wow. For 4,50 € not a bad choice. But I am not 100% sure if this is the real device or some copycat – nevertheless: in the end the functionality matters.
First project-idea is to create an extended and verifyable version of the random-reviewer. With display of the currently chosen person, a big buzzer-button as trigger and a web-interface for those who doubt the true randomness ..
good guides:
- https://robotzero.one/heltec-wifi-kit-8/ – hints for the board itself
- https://www.bastelgarage.ch/heltec-wifi-kit8-board-esp8266-32mbit – hints for the board itself
- https://github.com/olikraus/u8g2/wiki/u8x8reference#drawstring – library for drawing text; works well
I want my Wifi-repeater. Now!
Three weeks ago, while being in the garden, I noticed that there is no network connectivity except by superslow EDGE. Of course, three walls block the Wifi-router, but what about one repeater which is closer and just shielded by one wall? Also I remembered having read about the usage of some ESP-nodes for that. I don’t like the approach of buying some closed-source-product.
Short research yielded the project from martin-ger on Github, which I wanted to use. I was surprised that nothing for the ESP32 is available (only for ESP8266). So I tracked down my single ESP8266 (LoLin, NodeMCU, not sure which revision, but with CH340G-USB-connect and as DevKit (mingling with pulldown-resitors would add another layer of complexity, which I am not sure I want to tackle).
Turns out I could not flash the given item properly with the ESP8266 Download Tool 3.65. It blinks while doing so, but follow-up seral-monitoring onyl yields “lolin ts Jan 8 2013,rst cause:2, boot mode:(3,6)”.
So I ordered a from a german shop a new ESP8266. Looks like exactly the same model.
Will do some quicktest now with the blink-app (basic functionality and flashing works?). And then do a test with the ESP Download tool.
More later ..
ESP32: integrated the YL-69 for moisture-metering, also fried my first BME280
Acquired a Bosch BME280 for improved humidity, air pressure and temperature-measurement (DHT22 can’t read barometric pressure) and tried to attach it via I2C.
Let’s keep it short: the sensor got very hot after several tries to find the correct wiring. Even using the i2c-scanner testprogram did not yield any results. But I learned how to use the breadboard more effectively. The burnt IC will be sold as ‘Lehrgeld’ 😉 (Oh, the days when I fried my AMD Duron, because I thought that a CPU won’t heat up so fast at boot. Boy was I wrong.)
Integrated then at least via analog reading the YL-69 moisture sensor. Worked well and on first try. Guess I just need to read much, much .. more about I2C, wiring and the sensors.
Another lesson learned: if you want to see really badly structured, basic coding: check tutorials for microcontrollers :/ (especially mine ;))
———
Code is committed and pushed to github.
Output is something like:
|
1 2 3 |
Humidity (DHT22): 72.90 % Temperature (DHT22): 24.10 °C Temperature (internal): 31.11 °C Moisture (YL-69): 27% |
breadboard-setting featuring a Haworthia and WerNO!:

ESP32: first hands on MAX7219 and WiFi
For an investment of 80-90 minutes time I am quite happy about the result and amazed what sohisticated capabilites are offered at some really easily accessible level.
What has been achieved so far?
* setting up a working Arduino Studio 1.8.5-environment with ESP32-toolchain on a Win7-laptop (not my favorite, but Linux-PC was blocked)
* setting proper options to the IDE to make the examples compile and upload via serial to the board; learn how to use the integrated serial-monitor
* finding the proper PIN-setup for the MAX7219-LED-display (just one module – for now) and setting up the library
* playing around with the WiFi-functionality (scanning for networks)
* putting both tasks (network scan and led-output) together and running into the first “I need threads”-pit
[Video was taken at an early stage: a static string is displayed.]
Of course, THIS is nothing, just the very first tiny baby-step. Everyone is able to achieve this, because almost no creativity needs to be invested.
But: configuring all the necessary tools was already a pain in the ass. Of course, just read the manual(s) [..]
But this is not a “unwrap and press start”-toy, so the learning-curve was steeper than expected.
But I did it. And I look forward. Especially to put some threaded application on the MCU, because – why just run one thread, when you can have two? 😉
 [The MAX7219 and the ESP32-dev-board from MakerHawk hours before the first test run. Battery pack not included.]